Nitrogen, like other nutrients in fertiliser, is a salt. When you apply too much, you can get something called osmotic stress. This happens as the high concentration of salts in the soil or growing medium draws water out of the plant's roots instead of allowing the plant to absorb it. This is essentially chemical dehydration.
This can also occur on the leaf surface when granular fertiliser is applied to a wet leaf, and the granules stick to them instead of falling to the ground. In addition, it can happen when a liquid/foliar feed is applied at too high a rate.
Excess nitrogen can also directly interfere with the plant's internal processes, like cellular respiration and carbohydrate production, leading to a decline in function.
Symptoms of Nitrogen Scorch
The visible damage, or scorch usually appears on the leaves:
- Burnt Leaf Tips and Edges: The most common sign is the tips and margins (edges) of the leaves turning yellow, brown, or crispy and dry. This often starts with the older, lower leaves.
- Dark Green Foliage: Before the burn appears, the leaves may become an abnormally dark, intense green due to the excess nitrogen.
- Curling/Clawing: Leaves may curl downwards (sometimes described as ‘clawing’ or ‘hooking’) and become brittle.
- Stunted Growth: The plant's overall growth may slow down or stop completely as it struggles to process the nutrient overload.
- White Crust: In potted plants, a white, salt-like crust may appear on the soil surface, indicating a buildup of excess fertiliser salts.
Treating Nitrogen Scorch
If not corrected, severe nitrogen scorch can lead to root damage (root rot), wilting, and ultimately the death of the plant, so it’s important to tackle the damage as soon as you notice it. Here’s what to do:
- Stop fertilising immediately. This will prevent any further build-up of nitrogen salts in the soil.
- Flush the soil. Water deeply and repeatedly. Aim to water deeply and slowly over several days. This will help leach the excess nitrogen down below the root zone. Be careful to avoid creating standing pools of water. For potted plants, drench the soil with clean water using a volume that is approximately two to three times the volume of the pot.
- Prune damaged plant foliage. Use sterile, sharp secateurs or shears to trim off the most severely damaged leaves or tips. This will help the plant to redirect its energy to producing new healthy growth.
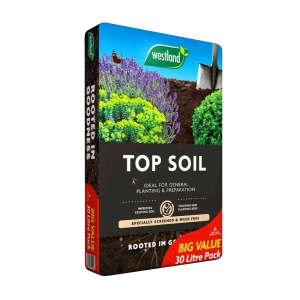
- If you are treating grass, rake away the dead grass and thatch to expose the soil ready for new seeding (if the grass is completely dead). Prepare the area and then spread a layer of topsoil / compost before overseeding.
- Allow the plants to dry after flushing. Do not water again until the top inch or two of soil is dry. This is because heavy flushing can temporarily saturate the roots.
- Check your drainage. Ensure the area you are treating has adequate drainage. One of the key reasons for fertiliser build up relates to poor drainage, so check and adjust as necessary.
- Test and adjust pH if needed. High nutrient concentrations can alter the pH of the soil, which complicates nutrient absorption. Whilst a pH level of 7 is considered neutral, having a soil pH of between 5.5 and 7.5 is ideal for most plants.
- Reintroduce nutrients very slowly. Do not resume fertilising for at least a few weeks to give the roots time to recover. Reintroduce fertilisers at a lower rate / concentration and monitor carefully for signs of new burn.
Though it may be tempting to add more fertiliser to quickly green up plants, it is generally better to under fertilise than over fertilise.
The time it takes for plants to recover will vary depending on the severity of the damage, the season / weather, and the plant species, but you will know that your recovery efforts have worked when you see healthy new green growth.
Unsure how much fertiliser to use? Give our technical team a call on 01522 246491.


