Why Is Cleaning Equipment Important?
Cleaning your equipment (such as your spreader, knapsack sprayer and mounted sprayer) is an important part of regular maintenance; ideally this should be done after each use to keep them in good working order. Correct maintenance, particularly in winter, will ensure the equipment is fit for purpose ready for the following Spring.
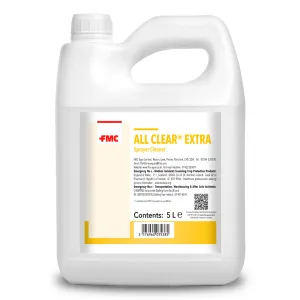
We recommend using Tank & Sprayer Cleaner & Decontaminant which is a specially formulated sprayer cleaner which removes pesticide deposits and other debris, including oily substances, from tanks, booms, hoses, filters and nozzles.
To avoid subsequent damage to other crops, all traces of herbicides must be removed from spraying equipment immediately after spraying. You can do this with a sprayer cleaner product. Before following any of the below instructions, we recommend that you ensure you are wearing appropriate Personal Protective Equipment (PPE).
Sprayers:
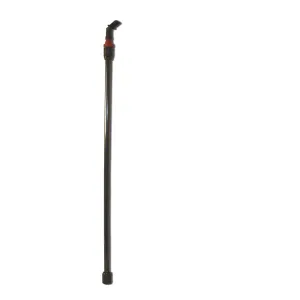
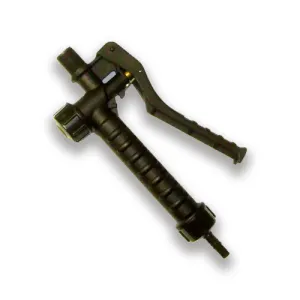
Hand-held Sprayers including knapsacks and pump sprayers
You will need:
- Clean Water
- An empty container
- A safe area for cleaning your sprayer away from animals, children, wanted crops, surface water such as streams or ponds, and must not be near any drinking water sources or other sensitive areas.
Method:
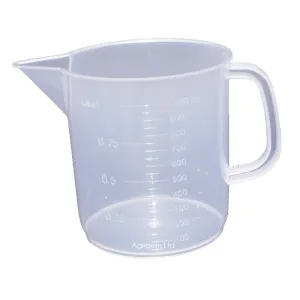
- Add approximately 1 litre of clean water to your sprayer tank.
- In order to ensure you are removing all pesticide deposits and all other debris (including oily substances) from your tank. Booms, hoses, filters and nozzles, we would recommend adding 1g of the Tank & Sprayer Cleaner to your 1L of clean water.
- Replace the lid on the sprayer.
- Shake and then carefully invert the sprayer.
- Remove the nozzle and the filter from the end of the lance. Soak both of these in an empty container of water.
- Remove the lid and tank basket filter from the sprayer, then direct the end of the lance into the tank and pump the lever to circulate the spray solution.
By doing this you are washing out the pump, hose and lance to remove any deposits or debris.
Mounted Sprayers:
Keeping your mounted sprayer tank clean will avoid the risk of the wrong chemical being sprayed on your crops and grass.
You will need:
- Clean water
- An empty container
- A safe area for cleaning your sprayer away from animals, children, wanted crops, surface water such as streams or ponds, and must not be near any drinking water sources or other sensitive areas.
Method:
- Drain the tank, and then rinse the inside of it using a pressure washer or garden hose with a nozzle. Special care needs to be taken not to let this water come into contact with your skin in case there is any chemical residue.
- Re-fill the tank with clean water and rinse though the spray boom for around 5 minutes.
- Once rinsed, shut the pump off then fill the tank again with clean water, adding 1g of Tank & Equipment Cleaner per 1L of water.
- Leave the sprayer with the water and Tank Cleaner solution in to sit for around 8 hours or overnight. This will allow the solution to remove all pesticide deposits as well as other debris including oily substances from your tank.
- Make a bucket full of water and the Tank Cleaner & Decontaminant, and add nozzles, screens and strainers to soak.
- The solution can now be flushed through the sprayer and booms.
- Rinse the nozzles, screens and strainers and put back into place on the sprayer.
- The system will need one final rinse through using clean water to ensure there is none of the cleaning solution in any of the parts.
Remember To Check:
There are a few things that you need to check to reduce any unexpected breakdown. Checking these components now will ensure you have time to replace any broken or worn part you may need before you come to use the sprayer in Spring.
- Fittings may become loose from the vibration during spraying, so it is important that you check the hoses for leaks.
- Filters need to be checked and kept clean to ensure they do not become blocked. This can be done by removing them and washing using a pressure washer.
- Nozzles need to be checked, any that are not performing as they should be need to be replaced. For optimum performance we recommend that you replace any nozzles that are spraying more than 10% of the original output.
Winter Storage:
During winter months, you will need to turn off your sprayer ends to that the remaining anti-freeze does not seep out. If you have a boom attachment that hangs lower than the sprayer, we would suggest you sit the sprayer on a few wooden pallets. Sprayers will need to be stored with no pressure build up in the plumbing lines.
Spreaders:
It seems common sense but these basic storage and maintenance rules can save you money. Firstly, make sure you empty the spreader before storing. We’d always recommend you store your spreader indoors in order to preserve the materials and therefore give it a longer life.
Lubrication:
To keep your fertiliser spreader working smoothly, if applicable to your machine, remember to oil all moving parts such as grease fittings, chains and sprockets. Again, like proper storage, If you do not do this you have a higher chance your spreader becoming stuck or parts breaking, and costing you money!
Keep It Clean:
After each use, not only should you empty your spreader but also be sure to brush out all the small bits of fertiliser. Then thoroughly rinse your fertiliser spreader with water and dry completely. Let's avoid unnecessary rusting.
Check Your Chains:
This isn't always applicable with your average garden spreader, but with the larger models of pull behind fertiliser spreaders that do have chains , these need to be checked to ensure that they are in good shape. Best to oil, tighten or replace them as well, as needed.
Paint Touch Ups:
The smaller spreaders are frequently made from plastic, whereas the the larger spreaders are often made from metal. If you own a metal spreader and find your paint starting to wear off, we’d suggest touch ups in order to prevent rust from eating away at these areas.
Worn Parts:
Finally, we’d advise any spreader owner to check your machine on a regular basis for wear and tear on parts. You can’t avoid spending on upkeep indefinitely, but when you ultimately find these parts on their last legs, best to replace as needed and in the long run you’ll run into fewer serious problems.
Stem Injectors:
Stem Injection systems have been specifically designed for eliminating invasive weeds such as Japanese Knotweed, Giant Hogweed, Himalayan Balsam & Horsetail. It is an ideal alternative to spraying in environmentally sensitive areas such as near water or around Plants & Shrubs. To ensure your Stem Injector is in good working order and ready to be used again in the New Year, we recommend following the steps below
Method:
- Disconnect the injection applicator from the backpack.
- Open the in-line tap.
- Drain chemical back into the backpack.
- Make sure to empty any chemical residue from the back pack back into the original chemical container (if using undiluted products).
- Store backpack with filling cap uppermost.
- Flush the injection applicator through with clean water.
- And finally, dry the injection applicator completely.
Top Tips:
- Remember to check that you are complying and fully following the manufacturers instructions when disposing of any chemicals.
- If you have an agitator inside your sprayer, operate it for 5-10 minutes to mix the cleaner with your water. If your sprayer does not have an agitator system, the solution will need to be mixed with a tool or stick.
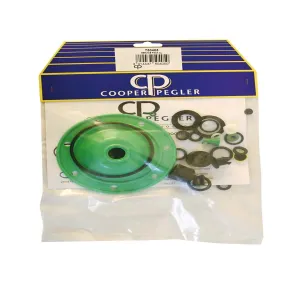
- Cleaning your sprayer will also allow you to check the seals on the trigger, valve and lid, as well as the pressure. These parts are easily replaced and depending on what sprayer you have, all you need is a service pack.