Here at Agrigem, we're passionate about making gardening accessible and enjoyable for everyone. Our range of top-notch equipment is designed to make your tree-planting experience seamless, from selecting the right soil to ensuring your sapling thrives in its new home.
So, roll up your sleeves, pick up a shovel, and let's transform your outdoor space into a green paradise.
- Selecting the right tree:
Choose a tree or shrub species that is well-suited to the local climate, soil conditions and available space. Make sure to consider factors such as the tree’s mature size, growth rate and potential impact on surrounding structures.
- Check for legal requirements:
If you’re a commercial planter, check with local authorities for any regulations or permissions required for tree planting.
- Prepare the site:
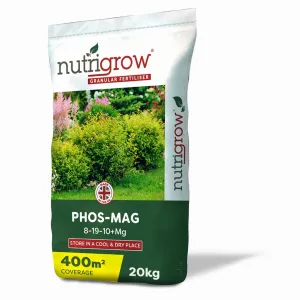
If your soil is dry and poor quality, consider applying some new fertiliser. Phos-Mag fertiliser is perfect for trees, shrubs and hedges. Next, clear the area of weeds and debris. Make sure there’s enough space for the tree to grow without interference.
- Timing:
It’s best to plant during the dormant season. Avoid planting in extreme weather conditions.
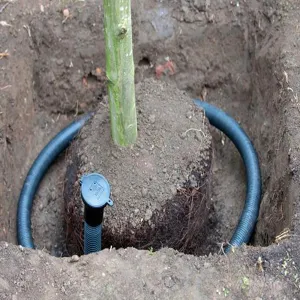
- Digging out:
Dig a hole that’s two times wider than the tree’s root ball. Loosen the roots at the bottom of your tree and place your tree in the centre of the hole. The top of the root ball wants to be at soil height. Lightly push into the soil.
- Apply your shelter:
If you’re planting a feathered tree, and live in an exposed location, close to wildlife, a tree shelter will come in handy, as it will protect from wind and browsing mammals. Our Tubex Nature Shelter comes with handy ties pre-attached, ready for attaching to a stake. It acts as a natural greenhouse, and expands as your tree grows. If you want extra mammal and vermin protection then opt for our Treebio Spiral Guard. Place your shelter over the top of the tree and lightly push it into the soil. If you’re planting a standard tree or semi-mature tree, then it will probably be too large for a shelter.
- Weed control:
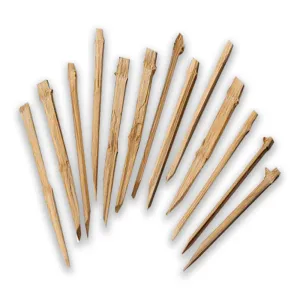
Add a layer of mulch, (leaving space around the base of the tree) then add a mulch mat for extra weed protection. Mulch mats help to prevent weeds growing up around your new tree. Secure it to the ground with bamboo pegs or layer over more mulch to hold in place.
- Apply stakes:
Stakes help provide extra support against harsh winds. Attach a stake to the side of your shelter, using ties, being mindful of the trees roots. Avoid using wire that can cut into the tree's trunk. Our Tubex Nature Shelter comes with handy ties pre-attached, ready for attaching to a stake. One stake will suffice for a small tree. For length, aim for half of the tree to be supported by the stake. As a general rule, the nearer the stakes are to the tree, the better, but if you’re planting a larger standard tree or a semi-mature tree, then opt for double stakes evenly placed either side of the tree's root ball, with a cross bar secured with rubber belting. - Pack and water:
Pack soil tight around the base of the shelter. Water as you backfill, to help settle the soil. Water the tree thoroughly after planting.
- Monitor and maintenance:
Monitor the tree for signs of stress, disease or pest infestation. Continue to water regularly, being mindful around dry spells. Remember to check your ties and adjust if they’re feeling too tight. Stakes and shelters can be removed after around three years, when the tree is established.
Planting your own tree can be a hugely rewarding process. With the right tools and know-how you'll have success!