When it comes to winter pruning, the main rule of thumb is only to prune plants in winter that have lost their leaves and are fully dormant, typically when there is no frost (which can damage fresh cuts).
There are several benefits to pruning in winter:
- During dormancy, plants are not actively growing, so pruning them causes less stress. There’s less sap flow, which reduces the chances of infection and disease.
- With many deciduous plants losing their leaves in winter, the plant’s structure is more visible. This makes it easier to identify damaged, dead, or crossing branches that could be removed.
- Pruning in winter helps prevent plants from becoming unruly in the spring. It encourages healthy growth and can improve the overall shape and appearance of the plant.
- Pruning stimulates growth in the coming growing season. With less foliage to support, plants can focus their energy on new shoots and flowers when the weather warms up.
Fruit Trees and Bushes (Pip Fruits)
Late November is the traditional start of the winter pruning season for pip fruits. The goal is to create an open structure that allows sunlight and air into the centre of the tree, which is crucial for ripening the fruit and preventing disease. Read on for technique on how to achieve this.
- Apples and Pears: This is the key time to prune established apple and pear trees. Prune to an outward-facing bud to direct next season's growth away from the centre and remove crossing branches too.
- Currants and Gooseberries: Prune blackcurrants by removing old, unproductive wood close to the base. For redcurrants and whitecurrants, focus on shortening side-shoots to about one-two buds to maintain an open, well-trained framework.
- Wisteria (first winter cut): Cut back those long, vigorous, whippy green shoots that grew over summer. Shorten them to about three-four buds from the main framework. This encourages the formation of fat flower buds for spring.
Ornamental Trees and Shrubs
- Roses (tidy up): Give tall bush and shrub roses a light reduction to prevent 'wind rock', where strong winter winds loosen the roots. The main hard prune is better left until late winter (February/March).
- Deciduous trees that 'bleed': Trees like acers (Japanese maples), birches, and walnuts are best pruned now while fully dormant (November to January) to prevent excessive sap bleeding.
Essential Tools for the Winter Prune
Successful pruning starts with having the right tools. Sharp, clean equipment ensures a clean cut that heals quickly, minimising the risk of disease entry.
| Task/Branch size | Recommended tool | Why it's essential |
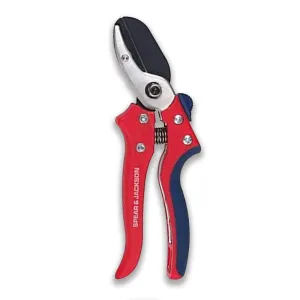
| Small cuts (under 1"/2.5cm) | Bypass Pruning Secateurs | For clean, precise cuts on young wood, removing dead rose heads, or thinning fruit spurs |
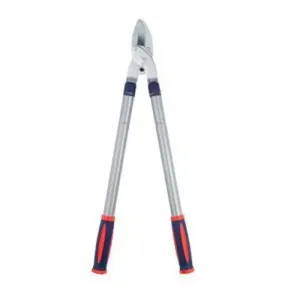
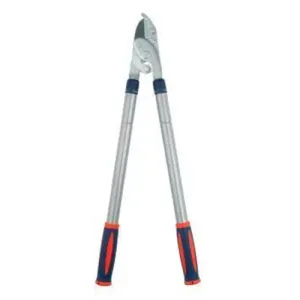
| Medium cuts (up to 2"/5cm) | Telescopic Lopping Shears | The long handles provide leverage for thicker branches on small fruit trees. |
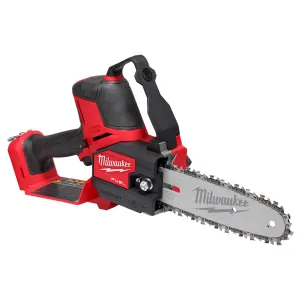
| Thick branches (over 2"/5cm) | Cordless Pruning Saw | Essential for removing larger branches such as old apple tree limbs. The cordless saw makes this job faster and less strenuous. |
| Repetitive / heavy work | Battery Pruning Shears | For reducing muscle fatigue during large pruning projects or hedge reshaping. |
Clean your blades with a sterilising solution (like a diluted bleach solution) before moving to a new plant, especially if you have been removing diseased wood. This prevents the transfer of pathogens between your valuable garden stock.
Tips and Technique
Always prune for the plant's natural shape. Cut back to a side branch or bud that faces the direction you want the new growth to go. Don't just randomly shear; this creates a dense outer shell that prevents light and air from reaching the interior.
Making the Cut
When cutting a stem back to a bud, make your cut about 6mm above the bud and angle the cut down and away from the bud. This slant allows water to run off, preventing moisture from pooling and potentially rotting the bud.

For larger branches you are removing entirely, make your cut just outside the branch collar. The branch collar is the slightly swollen ring of tissue at the base where the branch joins the main trunk or a larger branch.
This collar contains the natural healing tissues (callus) that allow the plant to seal the wound effectively. Never cut flush with the trunk, as this creates a larger, harder-to-heal wound.
The Three-cut Method
To prevent the bark from tearing and stripping down the trunk when a heavy branch falls, use this technique:
- Undercut: Make a shallow cut on the bottom side of the branch, about a foot away from the trunk.
- Top Cut: Make a second cut from the top, a few inches further out from the undercut, letting the branch fall cleanly.
- Final Cut: Remove the remaining stub just outside the branch collar.
What to Remove First – the Three D’s
Prioritise removing these elements in every pruning session:
- Dead wood (test with a scratch—if it's green underneath, it's alive).
- Diseased or Damaged wood (cut well back into healthy tissue).
- Dysfunctional growth (branches that cross, rub against, or grow inward toward the centre).

Clear Out the Centre
Thin the canopy by removing interior, crisscrossing, and weak branches. This improves air circulation (reducing disease risk) and allows light penetration, promoting healthier growth throughout the plant.
Remove Suckers and Water shoots:
- Suckers are vigorous shoots that grow from the roots or base of the plant below the graft union.
- Water shoots are fast-growing, vertical shoots that pop up along main branches.
Both rarely flower or fruit well and drain energy, so they should be removed.

Look for Bud Positions
You should remove the terminal bud when you want to:
- Encourage bushiness/density: Removing the terminal bud breaks the apical dominance. This releases the lateral buds below the cut, stimulating them to sprout and create two or more new, side branches.
- Control height/length: By shortening a stem, you reduce the overall size of the branch or plant.
- Correct an unwanted direction: You are redirecting the growth to a lateral bud that is pointing in a better direction (e.g., outward).
You should keep a specific lateral bud and make your cut just above it when you want to:
- Direct New Growth: You always want to cut back to a lateral bud that is facing the direction you want the new branch to grow. If you want a shrub to spread out, cut to an outward-facing lateral bud. If you want a vertical branch, cut to an upward-facing bud.
- Make a Thinning Cut: A thinning cut removes an entire branch or stem back to a larger branch, the trunk, or the ground. This is done to remove old, weak wood and is one of the most effective ways to open up the canopy for light and air without stimulating a thick mass of new growth. This essentially removes a whole line of lateral buds to reduce density.
The 'Hands-Off' List: What Not to Prune Now
Pruning the following plants now is counterproductive and risks removing the following year's buds or inviting disease.
Stone Fruits
Never prune stone fruits (cherries, plums, damsons) in the winter. Cuts in cold, damp weather make them highly susceptible to Silver Leaf disease. Instead, prune these in the summer (July/August).
Spring-Flowering Shrubs
Avoid pruning any shrub that flowers before June, as their flower buds were set last summer on the old growth.
Forsythia, lilac (syringa), magnolia, camellia, and rhododendron must be left alone. Prune these immediately after they finish flowering in late spring/early summer.
Evergreens
Most general evergreen shrubs are best left until late spring (April/May) when they start active growth. Pruning them now leaves the fresh cuts vulnerable to winter damage and cold weather.
Hydrangeas, bay (Laurus nobilis), and choisya should all be given a wide berth. Hydrangea blooms are best left on the plant to provide frost protection for the new growth buds residing below.
Follow these tips to actively sculpt the plant's growth pattern for the following spring. This will help you achieve the shapes you want to see and improving plant health ready for robust growth when the temperatures start to rise again.